How to take back up of Outlook Express
In most of cases the users are losing the email stored in Outlook Express when it comes to formtating of the system. And that is also a well known fact that most of the service provider did not wether the user is using the application or not until he is being told to do so. So here I am providing you the simple steps for taking the backup of the mails, addressbook and the configured account in Outlook Express. Pls follow the following simple steps and you will be able to take the back up of the mails. That’s it!!!
In Outlook Express there are three kinds of backups.
1. Mails stored under outlook express.
2. Account configured in outlook express.
3. Address Book.
1. Taking Back of Mails.
Step 1 :Open Out look Express.
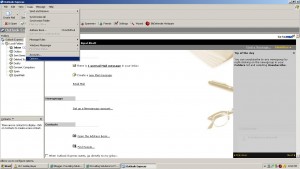
Step 2 : Go to Tools —-> Options.
Step 3 : On doing so one popup will appear. Navigate ot a tab named as “Maintenance”. Under this option you will find an option named as “Store Folder”. Click on that. For reference look the following image.
Step 4 : Copy the entire path shown under the pop up that appear after clicking on Sotre Folder. For reference look the image given below.
Step 5 : Now after copying the path click on Start —> Run. Paste entire path in the text box and then click on OK.
Step 6 : Now after clicking on OK, a new windows will open which will be containing all your mail files(DBX extemsion files.). You need to go up in explorer until you reached to “Idendities” folder.
Step 7 : Now copy the folder of “Idendities” and paste it to a destination folder or to any usb mass storage devices like pen drive. You may even burn out the CD of the same.
After completing above 7 setps you had successfully taken the back up of all the email. For cross varification you can compare the size of both the “Idendities” folder i.e. original one and the backed up one.
Now for the other two back ups you need to follow the below steps. The next step is “How to take the back up of the account configured in Outlook Express?”. This step will help you for after reinstalling the operating system when you need to configure the account in outlook express then it becomes a little tidy to job to inquire about the pop3 and smtp address, username and password of the account to customer. This back up will make you free from the tidy job as to configure the same account into the system all you need to do is to improt the account backup and that’s it. So follow the below steps and forgot the worries….
2. Taking Back Up of Account Configured in Outlook Express.
Step 1 : Open Outlook Express.
Step 2 : Go To : Tools –> Account. On doing so you will find the window shown in the below image.
Step 3 : Now as per the image you will find various account configured in Outlook Express. It might be possible that you might not find the default configured accounts of Outlook Express in case if the user might have removed them from the application. In that case you will find only the personlized account which might be configuerd in the outlook express. In this illustration it is highlited wiht red border and its “mail.ssindia.co.in”. Now you need to select the desired account that you need to take back up of and just click on export. Then you will find a pop up windows which will ask you for saving the file.(The extention of the account back up file will be *.iaf in case of Outlook Express.) Select the desired destination for saving the file. Moslty it should be a place other than the C Drive and the folder in which you might have stored the Idendities folder which was shown in the previous method. For reference look at the following images.
Now what you need to do is to click on Save button and that’s it. The Account is taken back up. But here I would like to bring to your notice that in rare cases the file may say its a corrupted file while you use it restore. So to have a safe side I request you people to note down the POP3 and SMTP values from properties of the account. This is a very rare posibilites that you will get the error. But you can never say its all about windows……. (joking!!!).
Now we will move forward to the third and final step. In some cases the engineers forget to take the back up of the address book which might be very painful if it contains a big no. of contacts. So here is the final step to take the back up of Address Book.
3. Taking Back Up of Address Book.
Step 1 : Open Outlook Express.
Step 2 : Just click on Addresses icon on the primary toolbar of Outlook Express which will open the Address Book in individual window.
Step 3 : Now Go To File –> Export –> Address Book (wab). Then give the desired name for the address book and select the destination folder. (Its a general practise that you give the name as “addressbook” and save it in the same folder where you had taken back up of Idendities and Account. And that’s it. Its over….. You have successfully taken the back up of Outlook Express.
The final folder where you have stored all the back ups should looked like the below image.
If any of you viewer find this article helpful or you have found it wrong then please put up your valuable comments in order to help me serve you better.


